
Using Exchange Online mail flow rules to reduce impersonation emails reaching your users
This how-to guide shows you how to help prevent impersonation of named users in your organisation, helping reduce the fraudulent emails that reach their colleagues.


Impersonation is the process of pretending to be someone (or something) you're not, and email is a popular way to try and impersonate. Business users often receive emails claiming to be from the Chief Executive Officer (CEO) or finance manager in what's termed "CEO fraud", and the impersonator then makes a request. Sometimes this is to make a financial transfer or a request to purchase a gift card and to provide the details, and I know of people who have been tricked into doing this. It's not their fault, and there are steps we can take to reduce the risk to our colleagues. In this how to blog post I'm going to show you how to reduce the impersonation emails your colleagues receive using Exchange Online mail flow rules.
What does an impersonation email look like?
Key to impersonation emails is their implied legitimacy - they have to look genuine. Often this means the impersonator has set up an email account with a display name of their chosen sender, for example the CEO. When the email client shows the email, the user sees the CEO's name so they don't check the sending email address (or the sender claims they're "not able to access my work emails at the moment, so I'm using my home address").
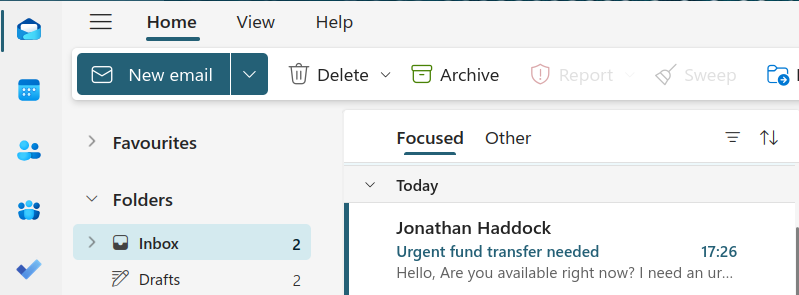
In my experience, the attacker asks if the recipient is available in their first email. This allows them to build a sense of urgency but also means they don't waste time with people that aren't around. Emails I've seen say things like:
Hello,
Are you available right now? I am stuck in meetings but I need an urgent fund transfer.
I cannot take a call, but please email me urgently if you're available.
Thanks,
Jonathan
Can't we just block the sender?
Blocking the sending email address isn't practical because the attacker (impersonator) will simply create a new address. The new address will get through, and you'll be playing "whack a mole" [2].

Using mail flow rules to quarantine suspicious emails
You follow this guide at your own risk, and must do so with adequate authorisation to do so. You accept that implementing this rule does not mean that no impersonation emails can reach your users.
Mail flow rules in Exchange Online allow us to redirect emails based on certain attributes. For this case, we're going to perform a match based on the display name for the email sender. If the sender uses the name of someone senior, or someone at greater risk of impersonation, within the company we will tell Exchange Online to direct the email to a quarantine. Here's the flow:
- The email arrives at our Exchange Online instance
- Our mail rule runs
- If the display name matches one that we've named in the rule:
- Send the email to quarantine
- Send a message to the original recipient saying there's an email in quarantine, and that they should speak to the IT or security team
- Send an email to the IT team saying an impersonation email has been sent to quarantine
- If the display name doesn't match, send it directly to the user
Before you implement this, I strongly recommend that you communicate to the business and the people whose names you're about to "protect", about the change you're about to bring in.
Creating the rule
First you'll need to login to the Exchange admin centre as your administrator account, either by going to https://admin.cloud.microsoft/exchange (the address as at March 2025) or by going via the Microsoft admin centre at https://admin.microsoft.com.
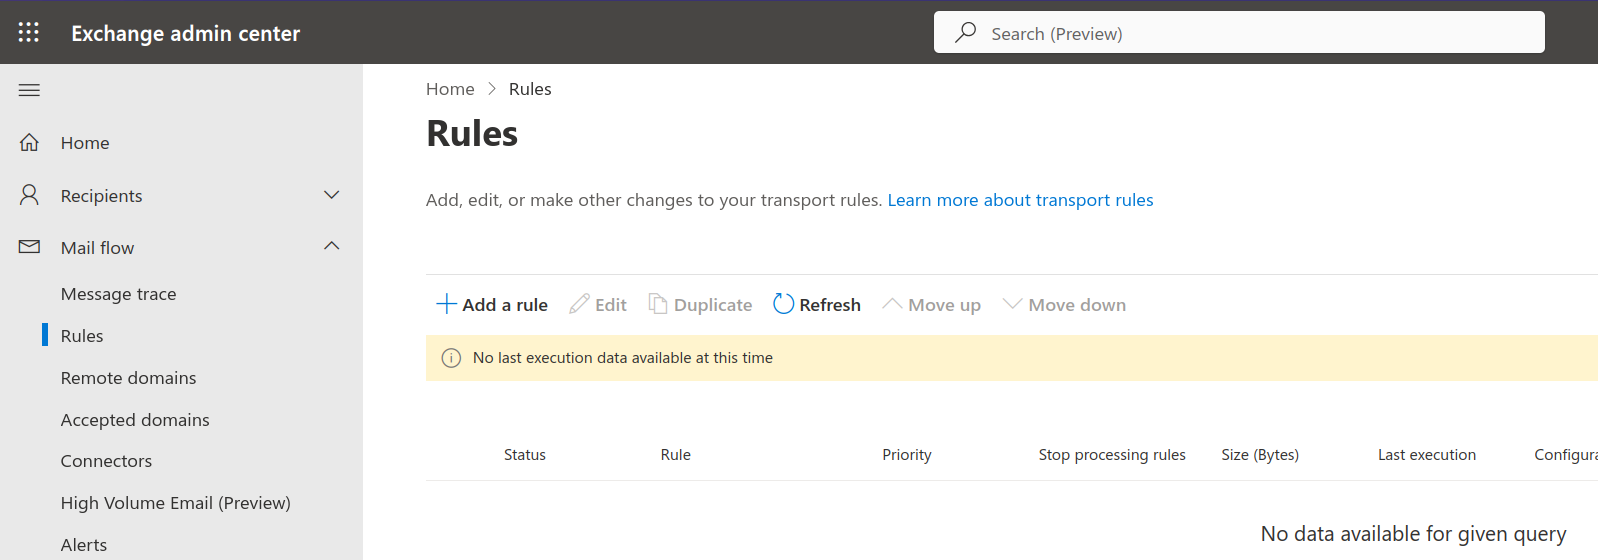
Once you're at the Exchange admin centre, expand the mail flow section of the menu on the left, and click Rules. If you already have rules these will show. Otherwise you'll see a blank list of rules like the one below.
Click + Add a rule from the menu bar and then create a new rule. A "slideout" will appear titled new transport rule and we'll be asked to set our rule name and conditions.
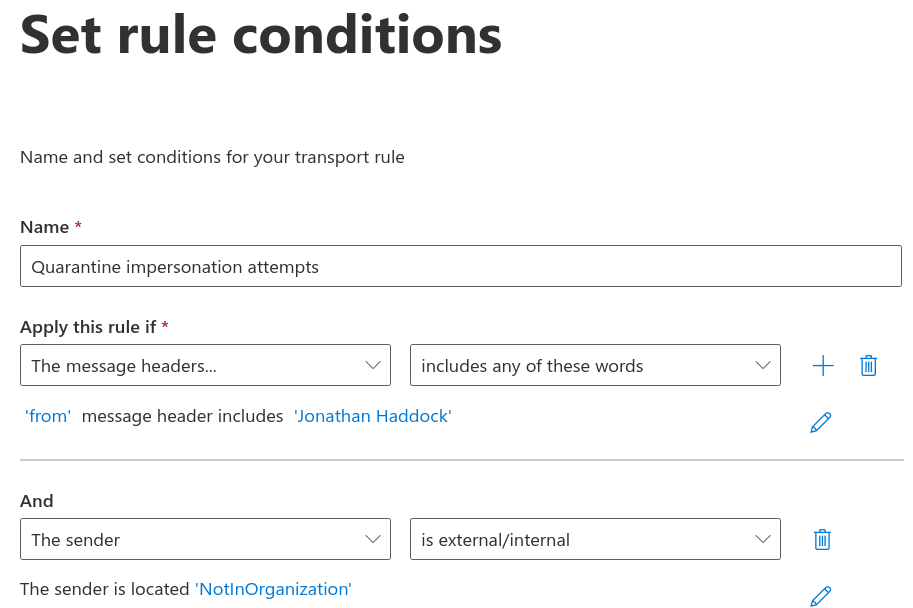
For the name specify something meaningful. I went with Quarantine impersonation attempts.
Set the conditions
Under apply this rule if we're going to specify two conditions. First, select the message headers... from the drop down box on the left and select includes any of these words from the drop down box on the right:

You'll notice that we have two prompts: "enter text" and "enter words" as prompts for "Enter text message header includes enter words".
- Click enter text and type
fromas the message header name (under the prompt specify header name). Then click the blue save button in the bottom left. - Click enter words and under the heading of specify words or phrases type the name of someone that you want to reduce the risk of being impersonated. For this example, I have entered
Jonathan Haddock. Click the blue add button to the right of the text box. Add another name if desired and press the blue save button when you're done.
We still want emails from legitimate users inside our organisation to be delivered, so we need to add another condition. To the right of includes any of these words is a blue plus button. Press that.
A new row has appeared with a heading of and with two more drop down boxes. In the left drop down box pick the sender is and then from the right hand box select is external/internal. A slideout will appear with a heading of select sender location. From the drop down box choose outside the organisation and then click the blue save button.
If you followed these instructions, you should now see your conditions looking like this:
Set the rule actions
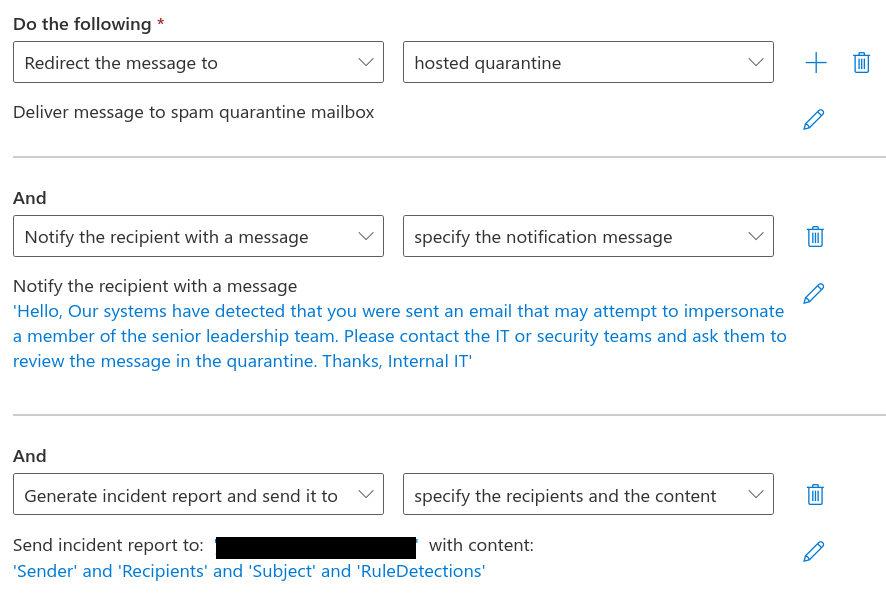
Now we need to set actions that will be applied to an email that matches the conditions. Under the do the following heading, choose redirect the message to from the left hand drop down menu, followed by hosted quarantine from the right hand drop down menu.
We want to perform three actions, so click the blue plus (+) button. A new row will appear under the heading of and.
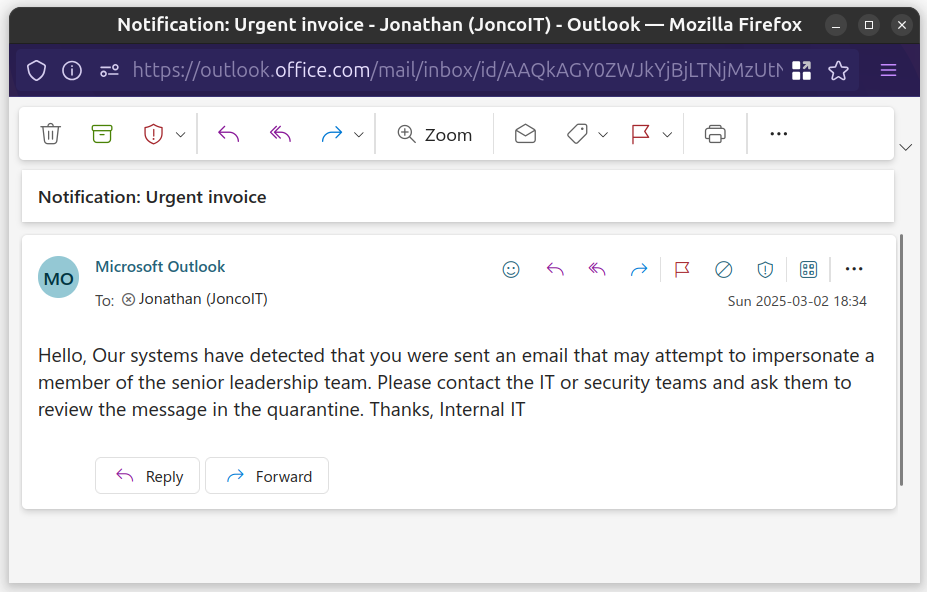
From the left drop down menu, choose notify the recipient with a message and then specify the notification message from the right drop down. A slideout appears asking you to provide message text. Enter something that will guide your user to contact their IT or security team, for example:
Hello,
Our systems have detected that you were sent an email that may attempt to impersonate a member of the senior leadership team. Please contact the IT or security teams and ask them to review the message in the quarantine.
Thanks,
Internal IT
Then click the blue save button.
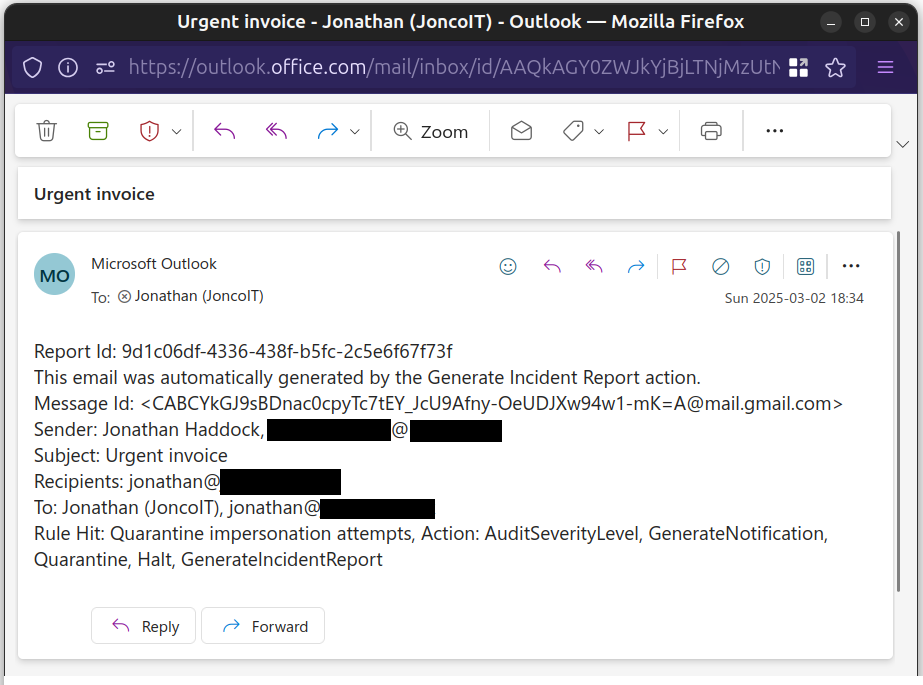
We need to add one more action, so click the blue plus button again. Another new row will appear. Choose generate an incident report and send it to from the left drop down and specify the recipients and the content from the right.
Underneath the drop downs there will be two prompts called: "select one" for "Send incident report to: Select one with content: Select one".
- Click the leftmost select one and choose a recipient from the slideout (you can either pick a person, or manually type an address and select it from the row). Then click the blue save button.
- Click the rightmost select one and you'll be presented with a slideout with various message attributes. Tick any options you want included in the incident report. For this example I've ticked sender, recipients, subject, and matching rules as this will give us enough information to locate the email in the quarantine. Then click the blue save button.
These actions should look like this:
Click the blue next button.
Configuring the rule settings
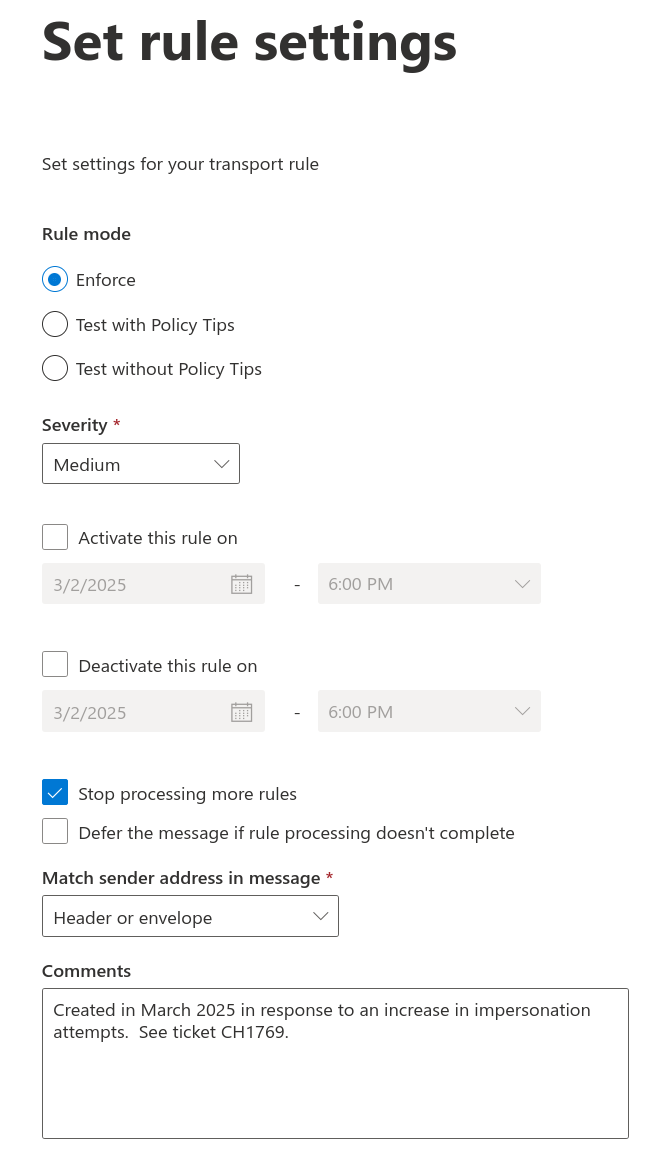
Once we've set our rule name, conditions, and actions we'll be taken to a screen called Set rule settings. Here we can set:
- The rule mode - after testing you'll want this set to enforce.
- A severity for the incident. I've picked medium in my example.
- When to activate and deactivate the rule. I'm not going to set values here, so the rule is active, and remains active, as soon as it's enabled.
- Choose to stop processing more rules (tick box). For me, once we've performed the actions above we've accomplished everything.
- Decide if we'll defer the message if there's a problem with the rule.
- Select header or envelope for Match sender address in message.
- Add any useful comments, for example "Created in March 2025 in response to an increase in impersonation attempts. See ticket CH1769."
Configure as desired - for me, this looked like the screenshot below:
Click the blue next button.
Save the rule
You'll be taken to a screen called Review and finish. Check everything looks as you'd expect, then click the blue finish button. After a brief pause, where the system will say saving you should be given a green success banner saying transport rule created successfully. Click the blue done button.

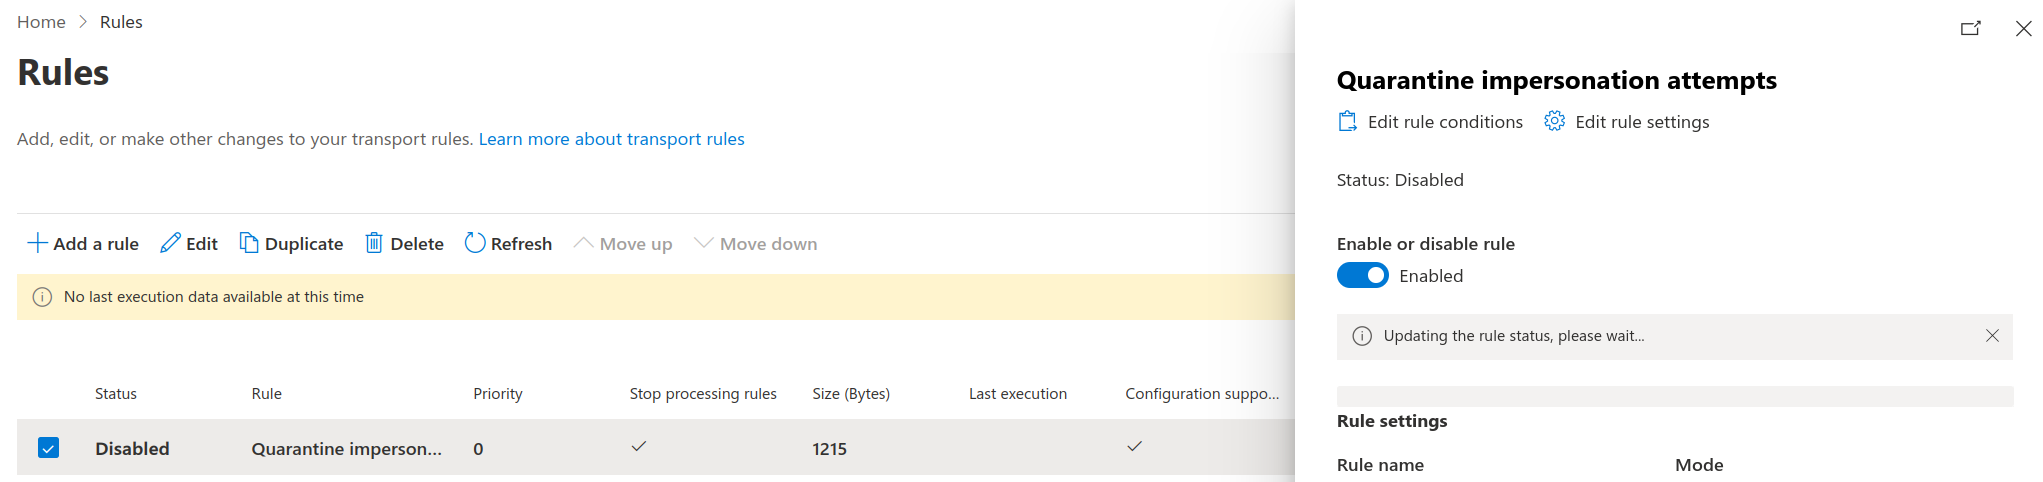
Enable the rule
New rules aren't enabled by default. From the list, click your rule (which will say it's disabled) and a slideout will appear. Click the enable or disable rule slider so it goes blue and says enabled. After a brief pause (where the system will say updating the rule status, please wait...) the rule will become active and you'll see a green banner saying Rule status updated successfully.
What do users experience?
Now when an impersonation email is sent to your users they'll get a notification. Your IT or security team will get an incident report, and the quarantine should contain the email.
User notification
Security incident report
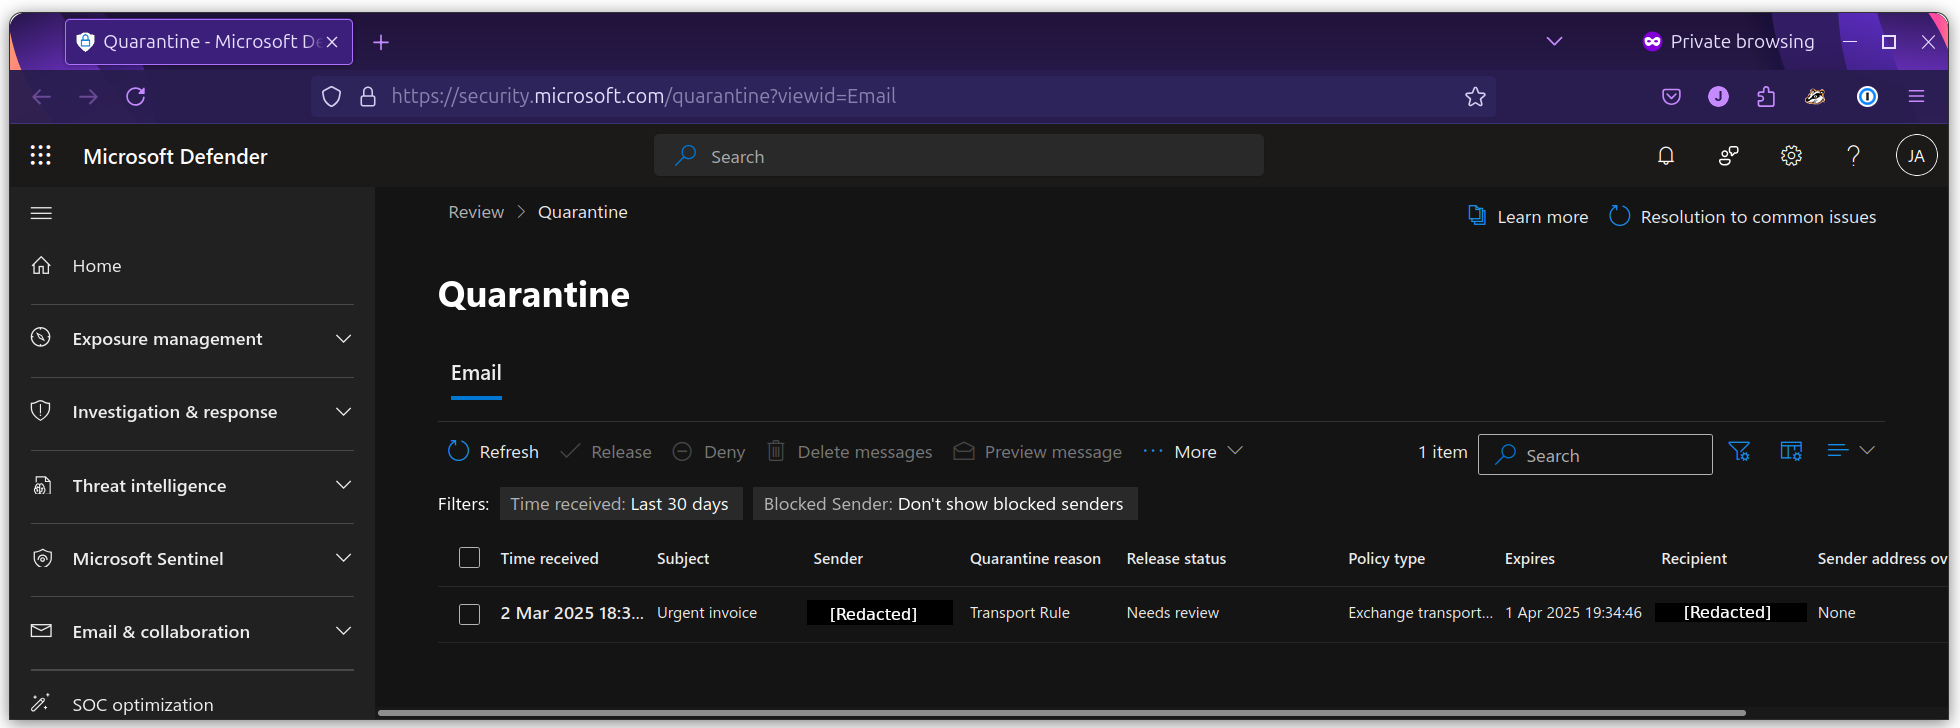
Quarantine
I always struggle to remember where the quarantine is, and as at March 2025 you can find the quarantine at https://security.microsoft.com/quarantine?viewid=Email. Depending on your permissions, you'll be able to preview the email and then release it if it's safe.
Allowing real emails from personal accounts
I don't know about you, but sometimes I email myself to-do items from my personal email account to my work one. If the people that you're protecting from impersonation do the same thing, you're going to have some quite angry colleagues.
We can modify our rule to not apply to certain addresses based on the except if configuration.
- Ask your users for their personal email addresses (assuring them they'll be used appropriately, only for this rule)
- Edit the rule you made earlier
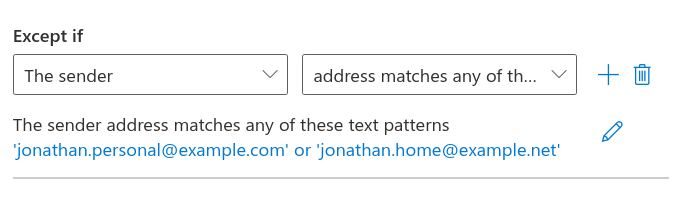
- Under the heading except if choose the sender from the leftmost drop down menu
- From the rightmost drop down menu choose address matches any of these text patterns
- A slideout will appear on the right titled specify words or phrases
- Type the address you want to protect, for example
[email protected]and click add - Repeat step 6 with additional addresses as needed
- Click save in the bottom left
- You'll be shown the rule configuration, check it's correct then click the save button bottom left again
- The rule will take some time to save before telling you Transport rule updated successfully
- Click Done
- Your rule will now not apply to the addresses you specified
What if someone else has the same name?
Names aren't unique! If you are working with an external party that has the same name as someone internally that you've protected, you'll need to allow list them in the same way you did above.
Conclusion
No solution will make you completely safe from attacks, but this will help protect your users as part of a defence in depth strategy. When I implemented this at a former workplace I'd often "trap" two or three emails a week. The number of false positives was low because of the communication I'd done in advance.
Banner image: Created by Copilot. Ghost only allows a short ALT text for banner images, full ALT text: "A man holding a brown envelope in an alleyway at night. He is wearing a tan coloured trench coat and a black hat with a brim. There's a pale blue street light in the middle distance, attached to a brown brick building. In the background there's a similarly dressed person in silhouette. For some reason, the man in the foreground is only wearing one black glove, while holding the envelope with both hands.
[1] Prompt: "Please can you draw me a banner that has a spy holding an envelope?"
[2] In a game of "whack a mole", the player has to hit a toy mole with a hammer every time its head pops up through a hole. Players get a bigger score for the more moles they hit in the time limit.