
Using Windows Sandbox
How to use Windows Sandbox, and how that can help you.

I first used Windows Sandbox in 2020 as part of Windows 10 Professional and found it to be quite useful. Unsurprisingly, when I upgraded my computer to Windows 11, the sandbox upgraded too. In this blog post I'm going to talk about how to use Windows Sandbox, some use cases and caveats.
My screenshots will be from the Windows 11 (22H2) taken in May 2023.
What is a sandbox?
Typically, a sandbox is an isolated environment that can be used to run code without affecting another system. By running the code (script or program) in the sandbox it's possible to test what it does without impacting a system that you actually care about. The sandbox is disposable, used for one task only, with a new sandbox started for the next session. Each time the sandbox starts it's in a known (good) state.
Isn't that a virtual machine?
It could be a virtual machine, and certainly Windows Sandbox is, but remember that not all virtual machines are sandboxes.
Architecture, hosts and guests
You can read more about this in Microsoft's documentation, but put simply Windows Sandbox is a Hyper-V virtual machine running on your computer. Your computer would be known as the host and Sandbox is a guest. When I mention host in this post I'm referring to your normal Windows environment.
Warning
It's important to note a few things before proceeding:
- If you use a third party virtualisation tool, like Oracle VirtualBox, that tool will break after installing Sandbox. This is because Sandbox uses Hyper-V, and Windows will lock the virtualisation extensions to Hyper-V only
- By default, the sandbox will have network access. This means that programs running will be able to access your network and the Internet. The default configuration doesn't give true isolation
Prerequisites
Virtualisation support
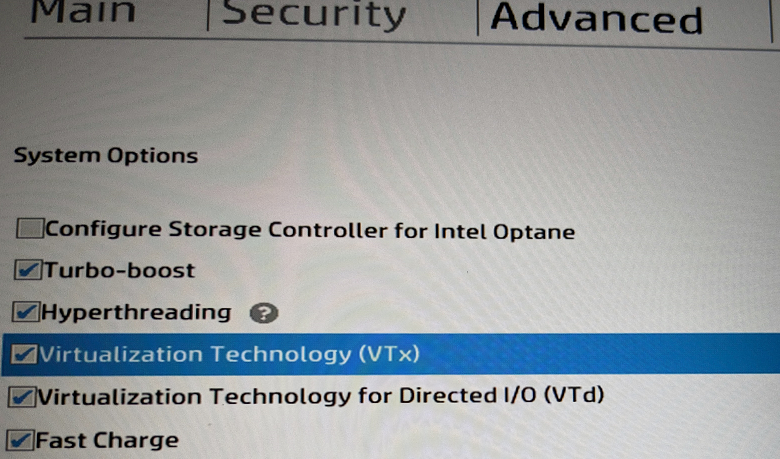
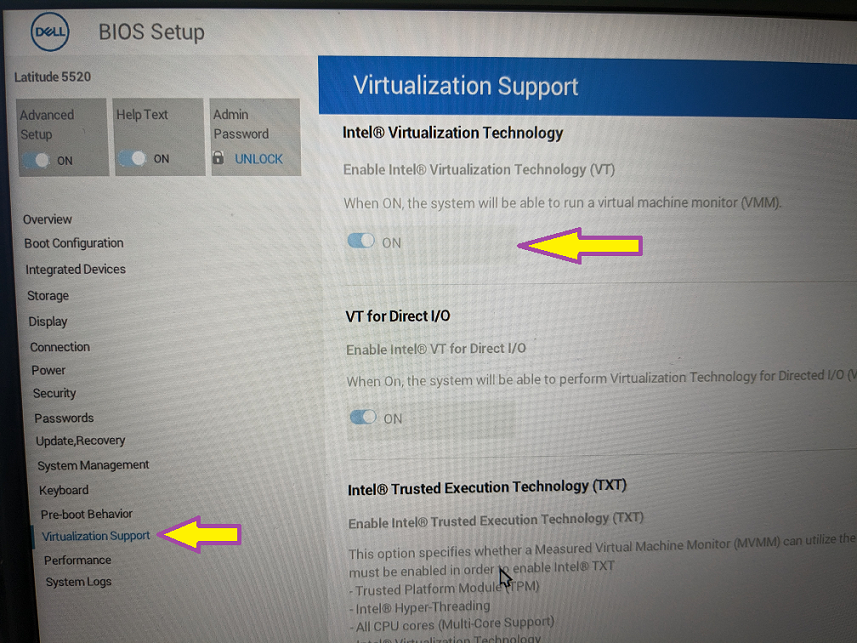
A lot of modern processors have virtualisation extensions built into the processor (e.g. Intel VT-x) but these aren't always enabled [1]. To use Sandbox you'll need to go into your BIOS and enable the extensions. As BIOS interfaces (and now UEFI) differ massively you'll need to consult your computer's manual to determine how to get into the interface, and what option to toggle.
Install the feature
I'm testing this on Windows 11, but the instructions should be close enough for Windows 10 also.
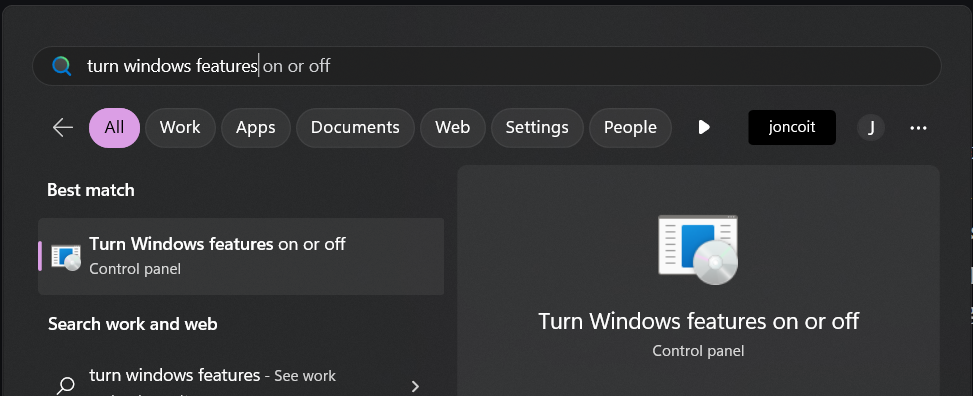
- Click Start
- Type Turn Windows features and hopefully you'll see Turn Windows features on or off, click that option
- In the dialog that pops up, scroll down to find Windows Sandbox
- Tick Windows Sandbox
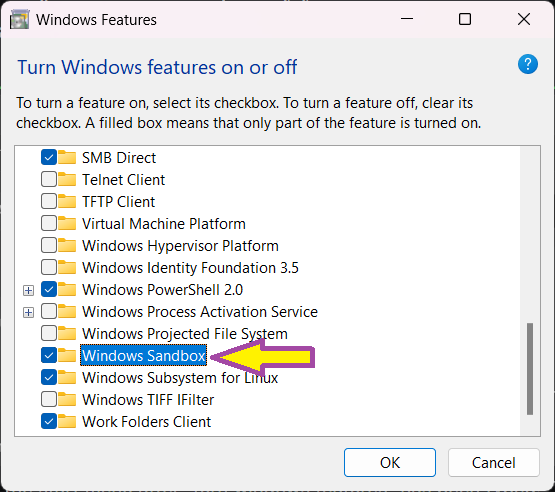
- Click OK
- Windows will take some time to install Sandbox, and you'll probably need to reboot your computer
Once installed you can find Windows Sandbox in your start menu.
Use cases
Quite often for my job I'll want a throw away environment that's quick to start. Windows Sandbox starts on my hardware in less than ten seconds which is quicker than any of my virtual machines on the same hardware.
My most common use case is to test a piece of software that someone wants added to our approved software list. Given I don't want to burden my host system with lots of extra files and registry keys, and that if I'm reviewing a piece of software I potentially don't trust it yet, a sandbox is a perfect tool here. After loading the sandbox I'll install the software under test, interact with it for a bit, write my tests up, and then dispose of the sandbox. Each test gets done with a fresh sandbox instance so there's no conflict.
Sometimes I'll want to browse the web without cluttering up my browser's history or saving extra cookies [2]. While I could use an incognito / private window for that, sometimes sites detect the use of that mode and display differently. Instead I can just use the browser in the sandbox. I can also use the sandbox's browser to get me another session for when I need to be logged in to a system as another user (first user in host browser, second user in host "in private" browser, third user in sandbox browser).
Another use case is for when you want to run a different version of an application, but your host system already has the application installed. Sometimes you cannot install multiple versions of the same application.
Potentially I could also use the sandbox to give myself a distraction free environment. Close Outlook, Teams, Slack on the host, open Sandbox and then use a clean browser (no extra tabs) from there. Not something I've tried yet but the idea appeals.
Features, limitations and caveats
Firstly, you're an administrator user within the sandbox. This means you can install programs, change settings (or the settings that Sandbox supports anyway) and play to your heart's content. You can do all of that safe in the knowledge that nothing is permanent 😀️.
As noted already, by default the sandbox is not completely isolated from your host machine. The sandbox has network access and you can copy and paste between your computer and the sandbox. This is useful for copying programs over (e.g. an installer for an application you want to test) or copy / pasting text.
While it looks like you're using a complete Windows 11 (or 10) environment it's not quite as full featured as your normal operating system. Some programs are missing, for example Paint, and not everything that you try to install will work correctly. As a test, I tried to install Microsoft Office 365 within a sandbox session and for some reason the setup process failed. I could run the applications, but they didn't run properly. Most of the applications I'm testing work fine though.
A lot of devices are passed through to the sandbox (sound, webcam, microphone, keyboard and mouse) but not everything is. If you plug in a USB memory stick that won't be passed through to the sandbox (good). Similarly my Yubikey hardware token that I use for multi-factor authentication doesn't get passed through.
For laptop users it's good to know that your laptop's battery status is passed through to the sandbox. This is particularly handy if you're working in the sandbox full screen and can't see your host machine's task bar 🙂️.
You can only run one instance of Windows Sandbox at a time (even when using custom configurations).
Can I reboot the sandbox?
Some software asks for a reboot after installation. So long as you choose to reboot from the start menu, you can reboot the sandbox and keep your changes. It takes longer for the reboot to complete than starting the sandbox normally.
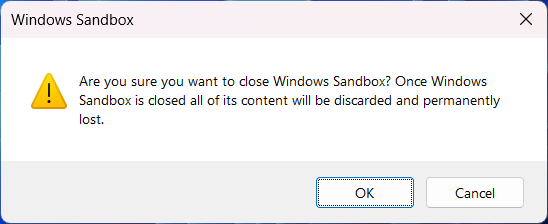
If you close the sandbox you'll be warned that all your changes will be lost:
Using custom configurations
Windows Sandbox can be configured by using XML formatted configuration files with a .wsb extension. Windows will automatically open .wsb files using Windows Sandbox when you double click them, which is the easiest way to start a session with that configuration. More information can be found in Microsoft's documentation.
You can download these example configurations. Note these come with no warranty of any kind, and you will need to change paths to suit your environment.
Sharing a folder
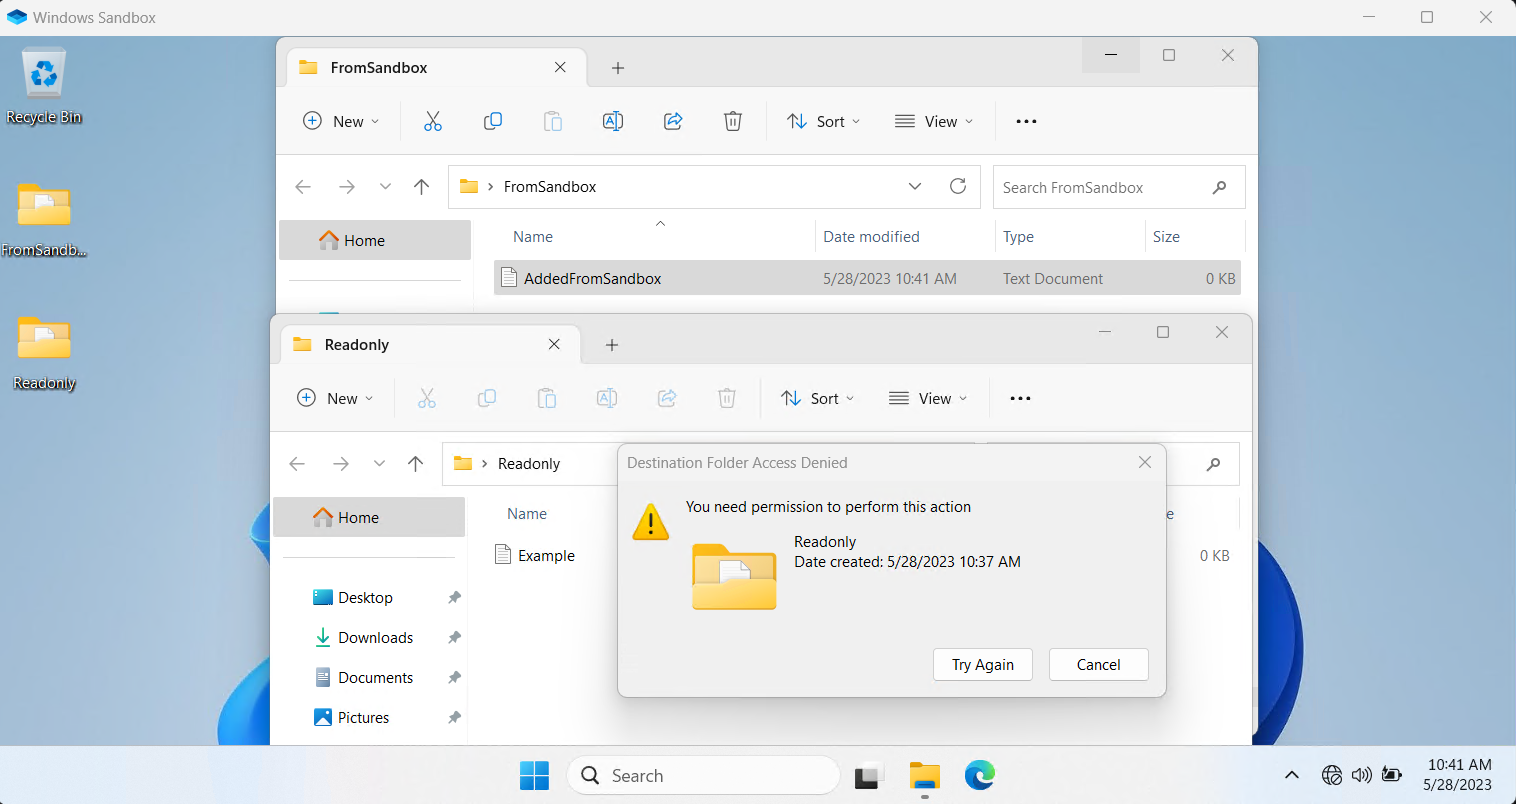
You might want to pass a folder through to the sandbox so you can access files from your host system. If you're going to do this, I recommend passing through a subfolder (not your whole C:\ !) that you've specifically designated for that purpose. You can also use ReadOnly mode to help protect the host system. Passing folders through is called mapping and is done using the MappedFolder directive.
An example configuration with a read only folder passed through from the host:
<Configuration>
<MappedFolders>
   <MappedFolder>
     <HostFolder>C:\Sandbox\Readonly</HostFolder>
     <ReadOnly>true</ReadOnly>
   </MappedFolder>
</MappedFolders>
</Configuration>Alternatively you might want a folder set up to allow the sandbox to write into:
<Configuration>
<MappedFolders>
   <MappedFolder>
     <HostFolder>C:\Sandbox\FromSandbox</HostFolder>
     <ReadOnly>false</ReadOnly>
   </MappedFolder>
</MappedFolders>
</Configuration>You can also combine these:
<Configuration>
<MappedFolders>
   <MappedFolder>
     <HostFolder>C:\Sandbox\Readonly</HostFolder>
     <ReadOnly>true</ReadOnly>
   </MappedFolder>
   <MappedFolder>
     <HostFolder>C:\Sandbox\FromSandbox</HostFolder>
     <ReadOnly>false</ReadOnly>
   </MappedFolder>
</MappedFolders>
</Configuration>Inside Windows Sandbox you can then access these folders from the desktop. If you want the folder to appear in a particular place you can specify a full path using the <SandboxFolder> directive (e.g. <SandboxFolder>C:\readonly</SandboxFolder>):
ReadonlyAndWriteableFolders.wsb in use.Running commands
If there's something that you want to happen immediately after the sandbox starts you can include a LogonCommand section in the configuration and use the Command directive. You can pair this with the mapped folder technique (above) to allow you to pass through an installation file. I've done this in the past to install a fresh Mozilla Firefox in my sandbox, which is the example I give below. You could also tell the sandbox to run a script on starting, rather than a single installer.
In the example below, the Firefox installer will be started automatically and run in silent mode. We won't be shown any installation progress, but as the defaults are used we will get a Firefox shortcut on the desktop once installation completes.
<Configuration>
<MappedFolders>
   <MappedFolder>
     <HostFolder>C:\Sandbox\Readonly</HostFolder>
     <ReadOnly>true</ReadOnly>
   </MappedFolder>
</MappedFolders>
<LogonCommand>
  <Command>C:\Users\WDAGUtilityAccount\Desktop\Readonly\FirefoxSetup.exe /S</Command>
</LogonCommand>
</Configuration>Alternative approaches
If you're running a version of Windows that doesn't support Windows Sandbox you could use a virtual machine tool (e.g. Oracle VirtualBox), install a guest OS, and then use snapshots to allow you to return to a known good state. This was my method of choice for years, and something I still do depending on what I want a throw away environment for.
Thanks & see also
Scott Helme wrote a useful blog post about using the Windows Sandbox to run dodgy programs safely. I first learned about Windows Sandbox through Scott's post and his instructions on custom configurations inspired my usage. Thanks Scott 🙂.
Microsoft has provided documentation on Windows Sandbox configurations on their Microsoft Learn site. You can also read more about the Windows Sandbox architecture.
Appendix - BIOS / UEFI instructions
Some example instructions based on the hardware I have available to test.
HP ProBook
- Tested on: HP ProBook 450 G6
- UEFI access key: F10
- Virutalisation extensions found at: Advanced > System Options > Virtualization Technology (VTx)
Dell Latitude
- Tested on: Latitude 5520
- UEFI access key: F2
- Virutalisation extensions found at: Virtualization Support > Intel(R) Virtualization Technology
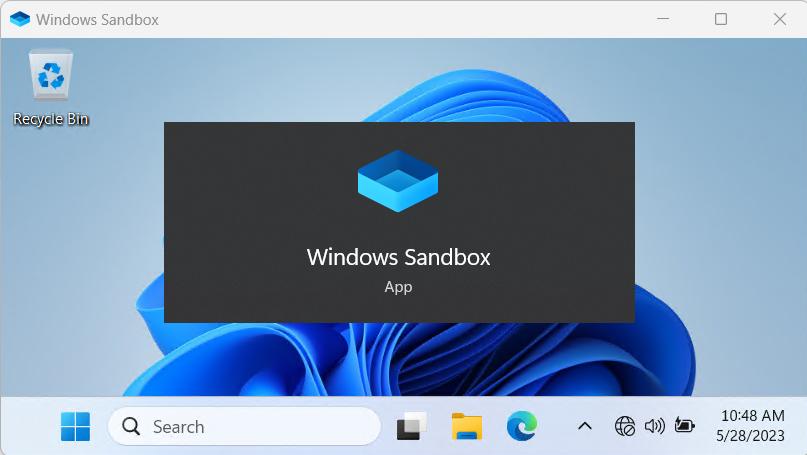
Banner image: Windows Sandbox running in a window, with its start menu option overlaid.
[1] If you're responsible for your organisation's hardware deployments I'd recommend making enabling this BIOS option part of your standard build process.
[2] For work / legitimate purposes, not to look at something naughty!