
Making a smart doorbell - part two
Having built my proof of concept smart doorbell I move the parts inside the enclosure, and add an automation.


In part one I wired up the hardware and flashed the firmware onto the ESP micro controller. After doing that I had a doorbell on my WiFi but it didn't do anything more than it did before - it still only rang a bell when the button was pushed. Now we'll make the doorbell smart by using Home Assistant to handle events. I also want to fit all the pieces inside the doorbell enclosure, as it's rather unsightly in its proof of concept look!
Two power sources
While the smart component of the doorbell requires a five volt power supply, the doorbell itself used three volts provided by two C sized batteries. Not only did it seem silly to me that I was using two power sources for the smart doorbell, the batteries also occupied space inside the enclosure so I had no space to place the smart components. Both of these problems can be solved using a five volt to three volt step down (Buck converter) board, so I ordered some of those and wired the doorbell and micro controller to it. These boards are tiny, about the size of two ten pence coins.
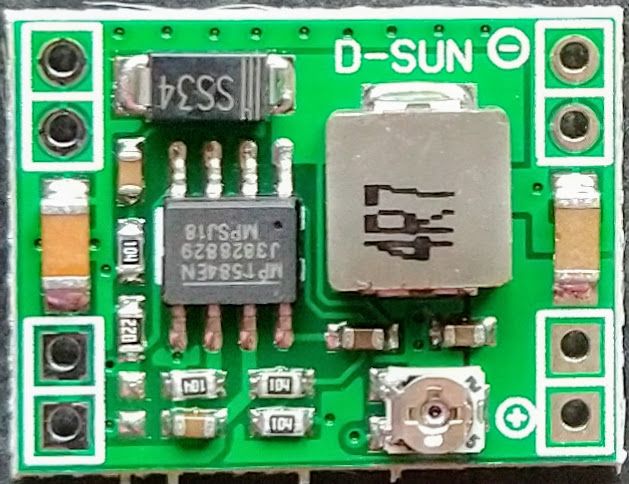
Fortunately I purchased five of these converters (five were cheaper than buying two) because I broke the adjustment screw on one and had all sorts of problems on another. Three boards in and I was sorted.
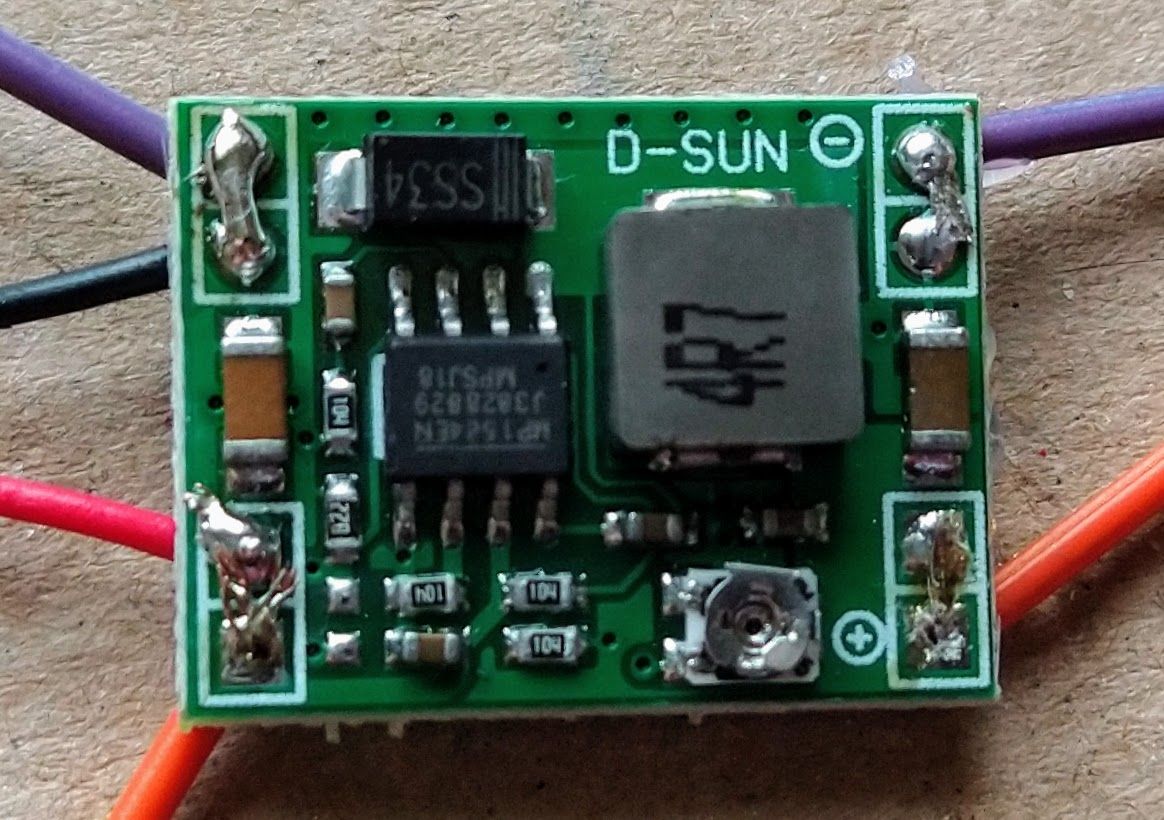
I'll let you into a tip that an electrical engineer friend of mine gave me at this point - a solder joint is only an electrical joint. You shouldn't try to use it as a mechanical joint. The air was certainly blue [1] as I had my solder joints break several times and I gave up for about two weeks. During that time we had no doorbell at all (no power) but I finally got the board working by protecting my joints with hot glue and using the same glue to hold the circuit board in place in the enclosure.
Below you can see the board (messily) soldered up, secured using hot glue on the underside. There are four wires on the left, the input side of the board. Power comes in at five volts from the USB phone charger via the centre two wires (black and red) and the orange and purple wires connect to the ESP micro controller, remaining at five volts. Electrically these connections are in parallel so there's no change to the voltage. On the right hand side there are purple and orange output connections, at three volts, which connect to the doorbell and replace the batteries.
Moving the parts into the enclosure
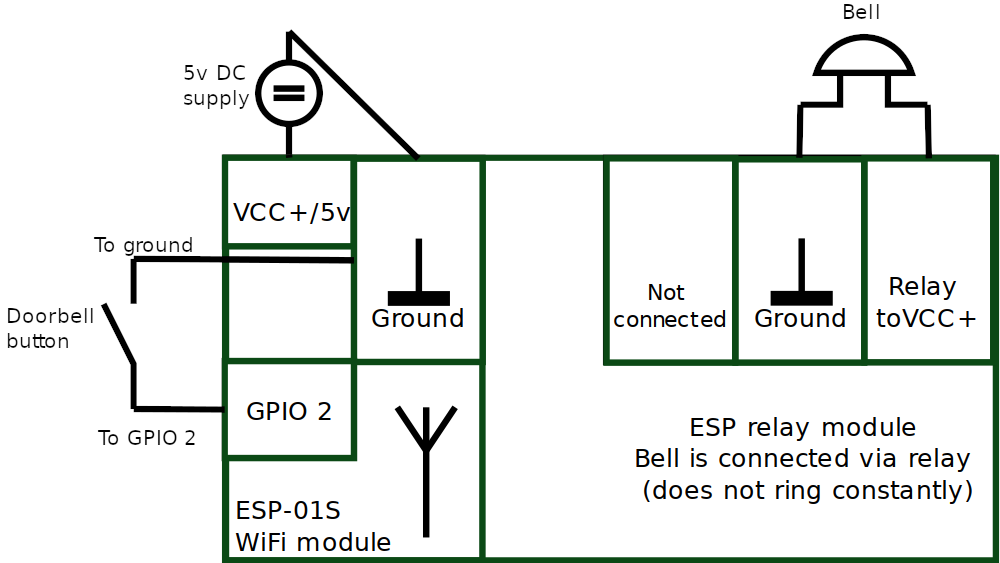
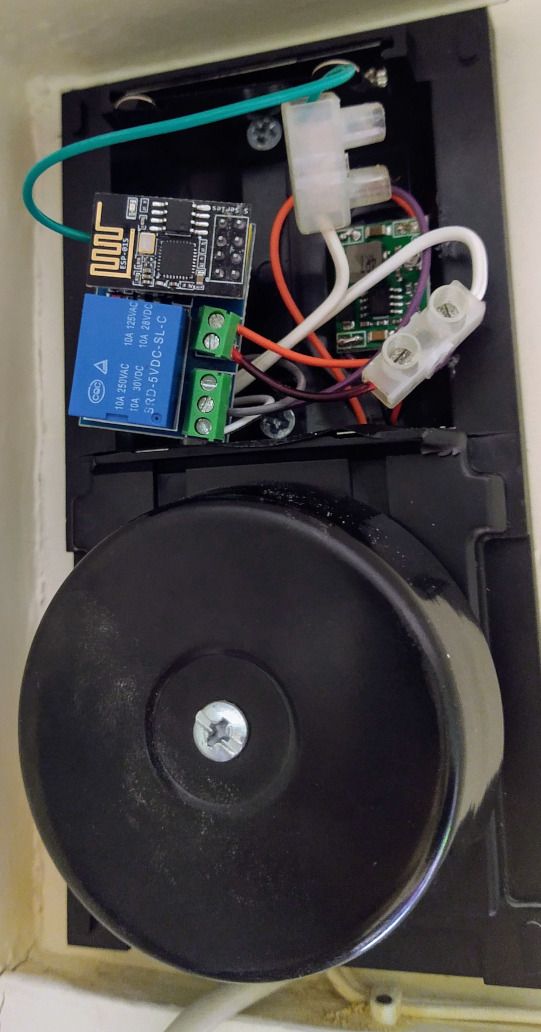
My solder joints to the button also kept breaking and my connections into the relay board kept falling out too. The latter because the screw terminals on the relay board weren't really big enough for two wires (see the wiring diagram). In the end I solved this problem by using two "choc block" terminal blocks, which was much easier than soldering at height and I should have done that right at the beginning! I might still tidy this up a bit, but the completed physical changes look like this:
Push notifications
So far, so good. The doorbell looks tidy and the whole unit is being powered from the mains (240 volts converted to 5 volts via a USB phone charger). Let's add the doorbell to Home Assistant, and I refer the reader to Frenck's guide for step by step instructions.
Browsing to Configuration > Entities in home we can see everything that relates to the smart doorbell. I've filtered my search by typing "door" in the search box at the top:
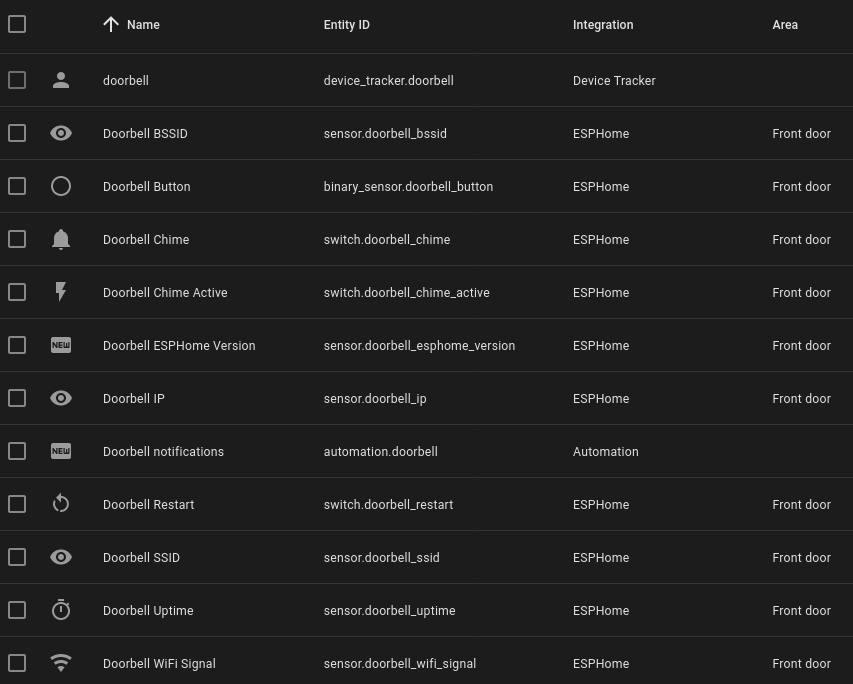
Using these entities we can build automations, making the doorbell smart. Frenck gives some examples at the bottom of his guide but for now I'm going with an automation to send push notifications to my phone. These are configured under Configuration > Automations.
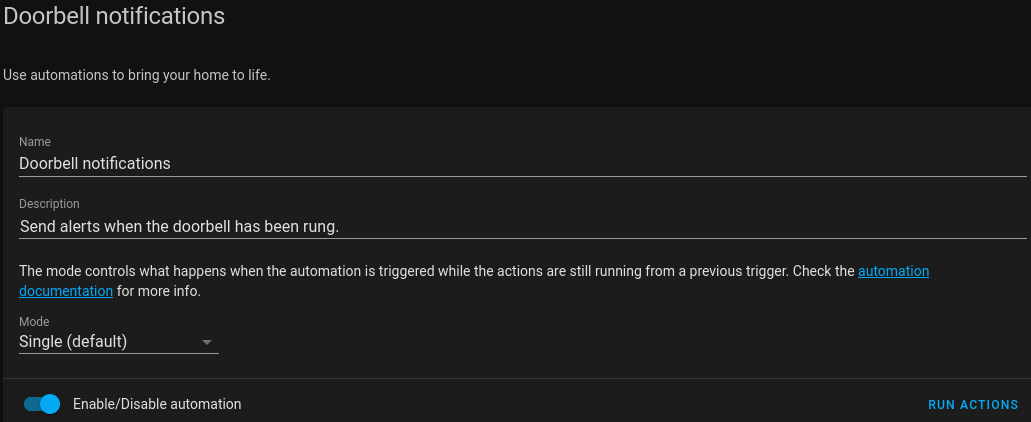
First we create the automation. Home Assistant will try to work out what you want to do based on a human language query, but I've never had that work. Instead I've created a blank automation and provided it a name and description. Mode is also set as "Single (default)".
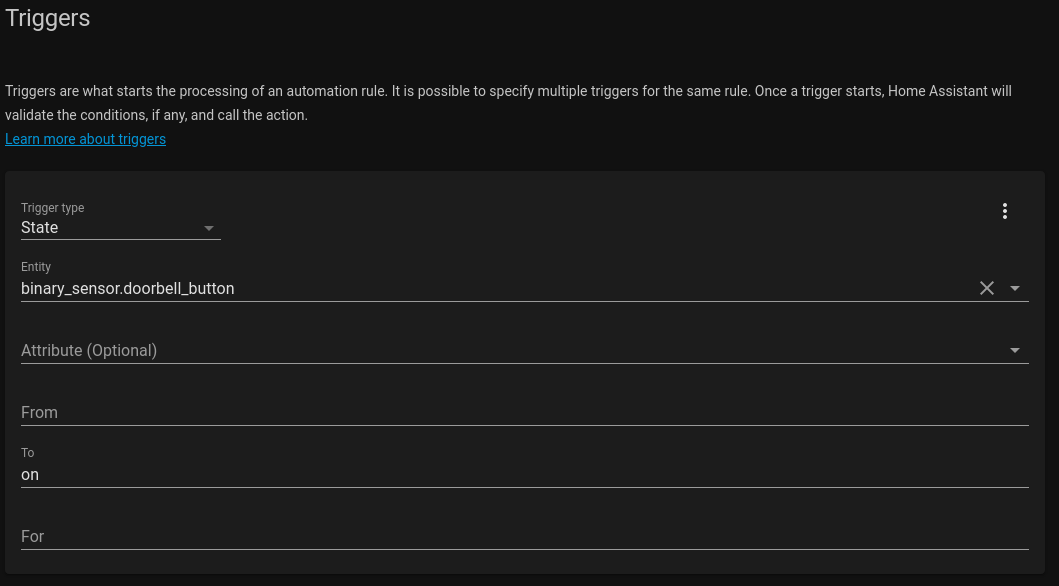
Next I specify a what makes the automation run under the triggers section. We're interested in the state of the button press, so the trigger type is state. For entity I need to specify my doorbell button, exposed to Home Assistant as binary_sensor.doorbell_button (being binary means the entity only has two states: on and off). We don't need to worry about the from state, just the to state, which we set as on.
We skip the conditions section - I want this to trigger regardless of time of day (or any other factors).
Under actions we specify what the automation should do when triggered. To send a push notification we set action type to call service and then select the notify service for my phone - notify.mobile_app_moto_g_8_plus. This is available to me because I'm using the Home Assistant Android app. Finally I provide the message and the title for the notification.

The result
As expected, I now receive a push notification to my Android phone once the doorbell button is pushed. I've got a Fitbit smart watch and the notification also arrives at my wrist. Because these are push notifications they arrive regardless of whether I'm at home or not - I don't need to be on my home network. Oh - the bell still rings too :) .
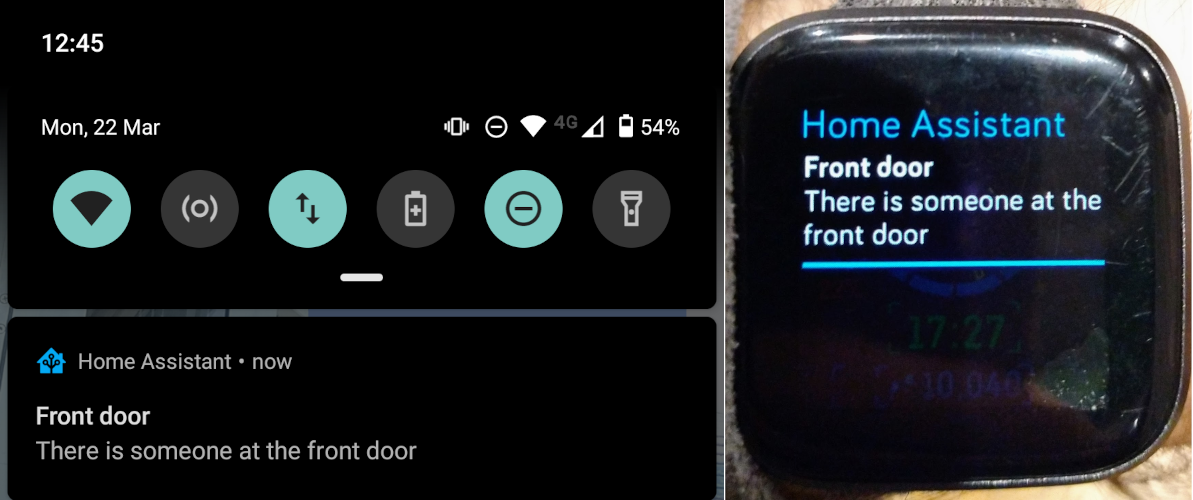
My wife also gets notifications to her phone, although hers says "there's somebody at the door" - it's easy to customise the text going to each phone.
What's next
Given that push notifications can take some time to arrive (my record so far is 30 minutes after the bell was rung) I'm intending to put a colour changing smart bulb in the lamp on my desk. Most of the time the bulb will be white (or whatever colour frequency I need), but when the bell rings I'll have it flash red a couple of times and then go back to its previous state by using Home Assistant scenes.
Later down the line I'd also like to put a camera in the porch, possibly powered by a Raspberry Pi Zero. Once the button is pushed I'll have the camera take a picture, all part of the same automation created earlier. I can probably send the image along with the notification, but I'll have to research that first!
Banner image: The doorbell, with all components inside the enclosure (rotated image).
[1] An English term meaning "I swore a lot".