
Review: Keychron K8 Pro (part 2)

Continuing from part one, where I talk about the keyboard's build and overall feel, in this post I'm going to cover how to program the keyboard, along with how it compares to my WASDv3 and how I've found the keyboard after over two months of on / off usage.
Usual disclaimer: This keyboard was purchased by me, with my own funds. Beyond providing me with their service, neither Keychron nor KeyboardCo have influenced this review in any way (they didn't know I'd be writing it). When I review a product, my intention is to always write an honest review.
Programming the keyboard
Before you can program the keyboard you'll need to connect it with a cable - one was provided in the box. You'll then need to download VIA from GitHub, where there are releases for various operating systems. Once you've opened VIA it will search for a compatible keyboard:

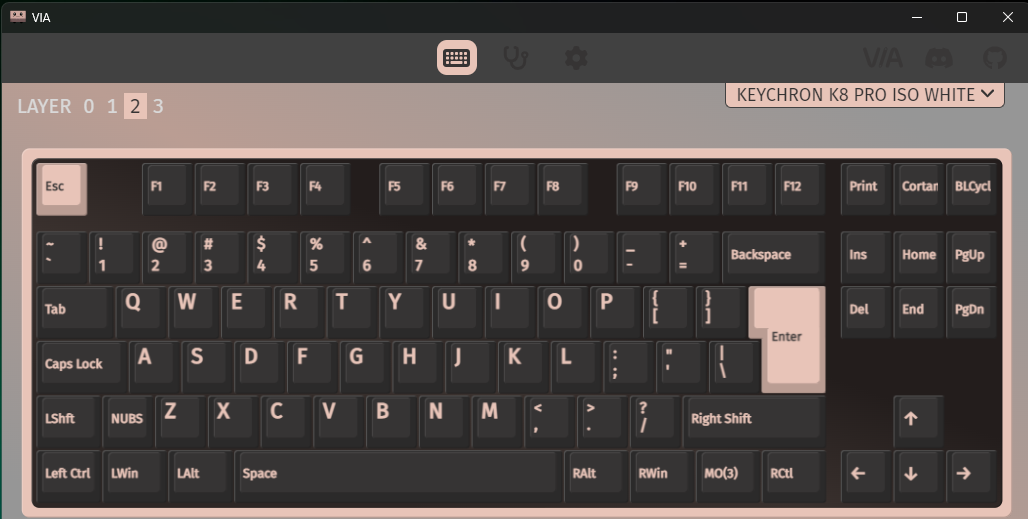
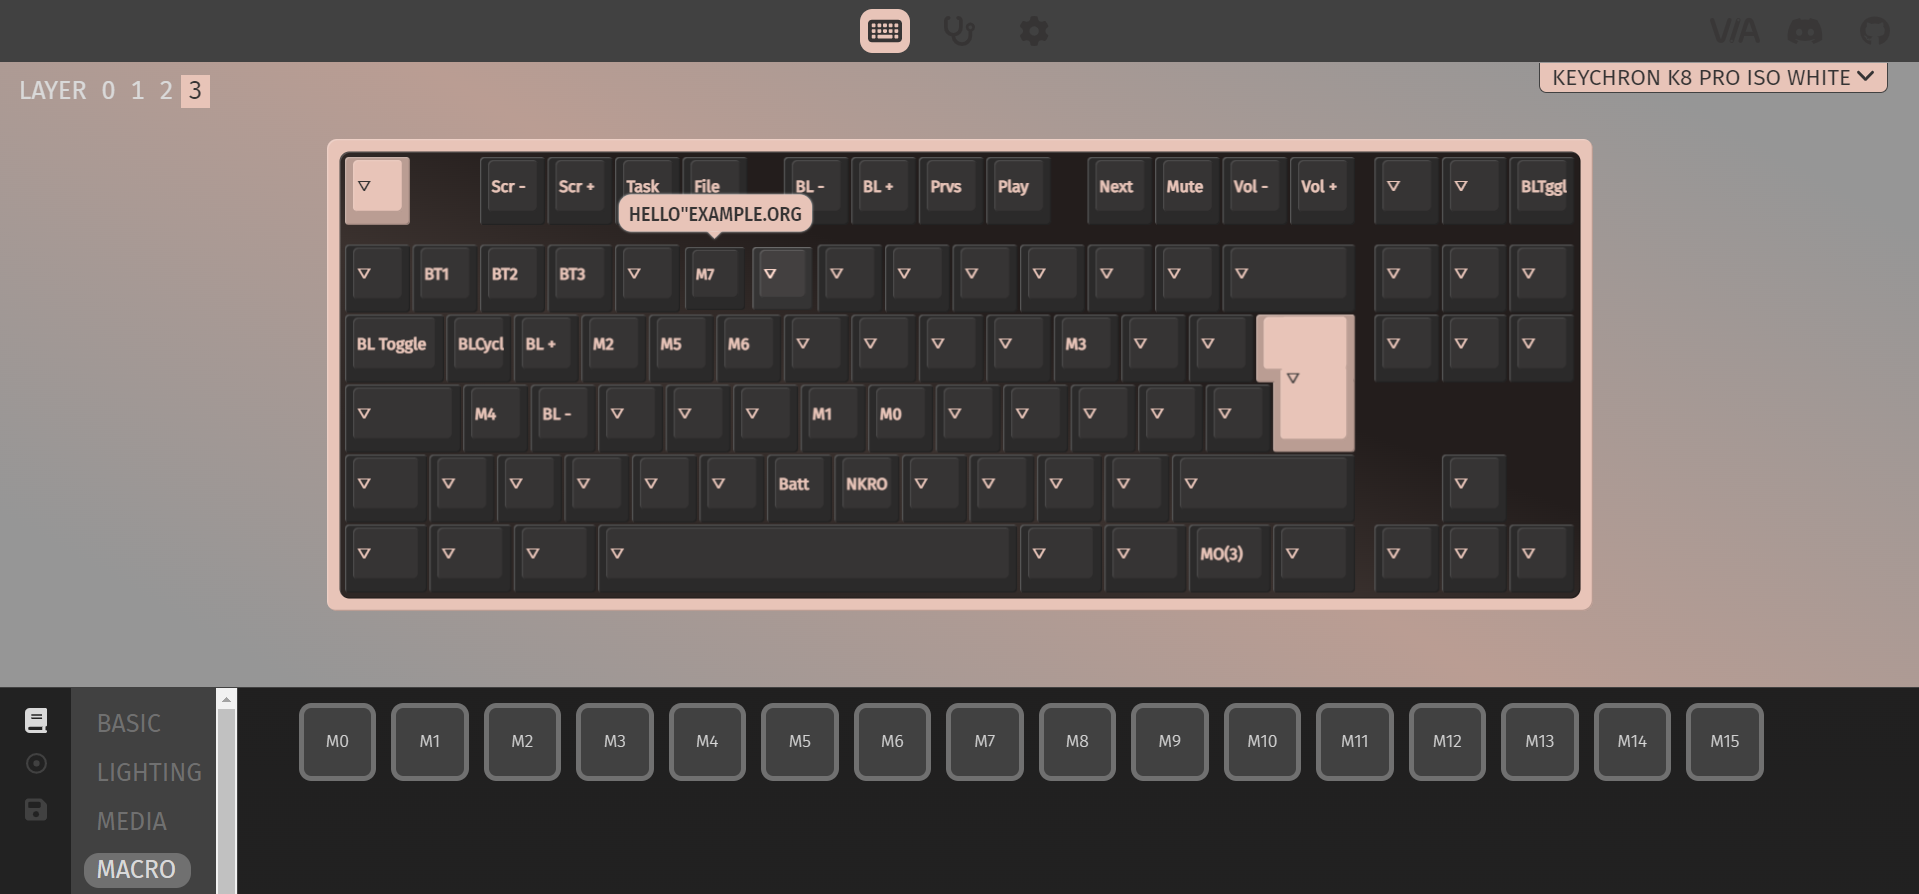
Once your keyboard has been detected VIA will show you your keyboard at the top, like it does in the banner image for this blog post. At the top right of VIA you are told what keyboard has been detected - a "Keychron K8 Pro ISO White" in my case. I'm not sure what "white" relates to, unless it's my keyboard's backlight 🤷♀️. "ISO" means the board is the ISO keyboard layout (an inverted "L" shaped enter key).
It's worth noting that despite my board being a British English layout, with double quotes (") on shift + 2 and a pounds Sterling (£) symbol on shift + 3, VIA shows an American layout with @ and # on those keys. Similarly the backslash ( \) is to the left of enter, where # should be. Don't be fooled - VIA is still compatible with the British English board, but you do need to remember that it thinks in an American way when programming macros.
It's worth noting that VIA seems to save to the board instantly, so you can find yourself in a position where you accidentally delete a key binding from a physical key, and then you can't use it. Fortunately you can put the key binding back.
I describe how to map a macro to a physical key below, but you can use a similar technique to map any other function to a physical key too - even mouse buttons. You choose the feature you want to map from the list in the bottom left of VIA, shown under categories like basic, lighting, special, etc.
It's worth noting that VIA saves instantly, so if you make a mistake it will happen immediately. Fortunately you can still make changes within the editor.
Writing a macro
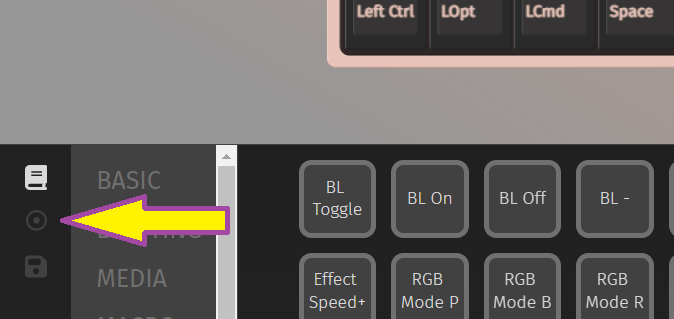
This took me a bit of working out, largely because I didn't read the manual...but it's not too hard. Once VIA has loaded, the the bottom section there's three navigation buttons on the far left. To access the macro definitions we want to click the circle with a dot in its centre. On the screenshot below I've marked this with a yellow arrow:
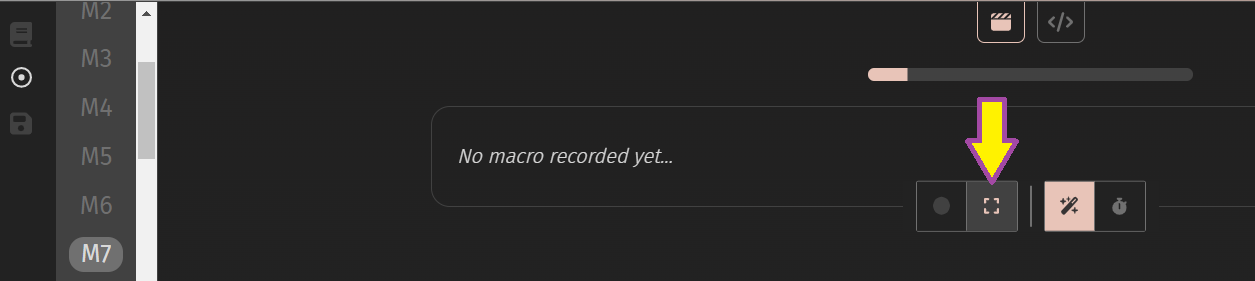
Once you've opened the macro section there are sixteen macros available, numbered zero to fifteen. Select the macro you want to edit and then use the full screen icon to make VIA full screen - this will allow you to record the macro. In the screenshot below I'm editing macro M7 and I've indicated the full screen button.
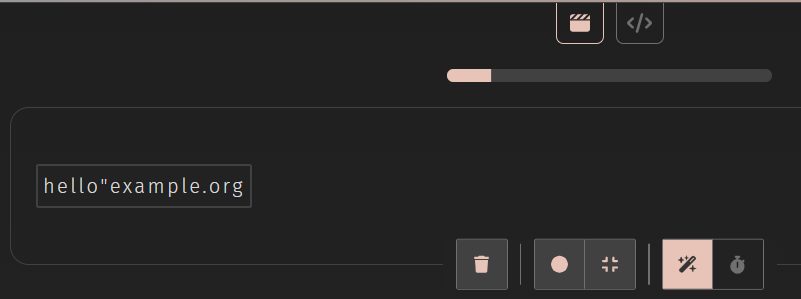
Once you're full screen you can click the "record" button and type what you'd like the macro to do - this can be straight characters or key combinations involving ctrl and other modifiers. For this example I typed [email protected]in order to type that email address when the macro is run. Once I was done typing my macro I clicked the stop button followed by the floppy disk save button to save the macro.
Note that in via this shows as having a double quote in place of the at sign, as already discussed:
Mapping the macro to a key combination
Once we've got a macro recorded it won't do anything. The macro is saved to the keyboard's memory, but it won't trigger unless we map it to a key combination.
From the leftmost navigation, click the keymap icon (it looks like a book, and is above the macros button we used earlier). In my case, I wanted to map macro M7 to the key combination Fn + 5. To do this we first need to be on the correct layer, by using the layer switcher at the top left of VIA.
- Layer 0 - MacOS
- Layer 1 - MacOS layer 2 (accessed by pressing
Fnby default - Layer 2 - Windows / Linux / other
- Layer 3 - Windows layer 2 (accessed by pressing
Fnby default
On the keyboard there's a small switch on the left side that allows you to put the board into "Windows" or "MacOS" mode. I'm using the board in "Windows" mode, so I'm interested in layers two and three.
Selecting layer three I can see the interface changes to show how layer three looks - in the screenshot below there's a combination of the default keys plus macros that I've already configured. Macros are indicated by an M followed by a number (e.g. M2) and the down arrows mean "pass through" (i.e. "do nothing on this layer, act as though we're on the other layer").
First I click the key on the image that denotes the physical key I want to map the macro to, in this case the number five.
Next I choose the "macro" section from the bottom half of the editor. This is not the macro editor (the circle icon), but literally the word "MACRO". This shows squares for macros M0 to M15. Clicking M7, which is where I added [email protected] should cause M7 to appear on the 5 key. You can ckeck you've got the correct macro by hovering the mouse over the key, or using Fn + 5 to type the output immediately. When I was finished applying this configuration, VIA looked like this:
Comparing to my WASD v3
Some of you will know that my "daily driver" keyboard has been a WASD v3 keyboard that I purchased in 2019. Out of the two boards, I still use my WASD v3 the most as it's on my work desk, and gives me the number pad that I still reach for after 30+ years of having one available. My Keychron K8 Pro is mainly for when travelling.
Weight wise, my WASD v3 keyboard weighs 1.159 KG and the Keychron K8 Pro comes in at 1.124 KG - not a huge amount of difference. When travelling, physical space will be the main difference, the K8 obviously being smaller. I describe both boards as being heavy enough to kill someone with [1].
In terms of cost, the K8 Pro was significantly cheaper, by about £100. This is partly down to the fact that my WASD v3 has a custom keycap set so I could have both UK QWERTY and UK Dvorak legends showing on the keys - at the time WASD v3 was one of the only places that could do that.
Build quality of both the K8 and the WASD v3 is good, although I did find the keycaps more fiddly to fit on the K8 - they just seem to be lighter and less easy to handle. That's possibly due to a difference in physical key profiles (designs).
I really appreciate the K8 having a graphical tool, VIA, so you can see the configuration that's applied. VIA also lets you save the configuration, so if you have multiple K8 boards you can easily apply the same configuration to both. Sadly the WASD v3 has no equivalent tool, so configuration is done entirely blind. A notable difference is the K8 only has two effective layers (two for Windows, two for MacOS), whereas the WASD v3 has four. I've only ever used two though so this isn't a deal breaker for me. The WASD v3 also requires you to entirely switch layers, whereas the K8 switches based on a modifier key (Fn by default).
Thoughts after longer usage
There are times that I reach for the number pad that's not there, which can be annoying. I just have to remember it's not there and then I carry on, but it doesn't stop me hitting the "table key", which oddly enough does nothing 🤣. I really like the K8, and mostly use it connected via Bluetooth when I work from another office (the co-working space I use for example). At least being Bluetooth I can't accidentally forget the USB-C cable (I have forgotten to pack it with my WASD v3 before...).
I've not had a problem with battery life yet, and although I've charged it as part of standard maintenance I've no idea if I actually needed to.
The K8 seems to be more noisy than my WASD v3, so I'll probably apply some O rings to help reduce the noise. At least it's not got "blue" clicky switches!!
Overall a good purchase I think.
Banner image: The VIA keyboard layout editor.
[1] It should be noted that I've never killed anybody, and that I couldn't tell you what a "reassuring weight" for a murder weapon is.